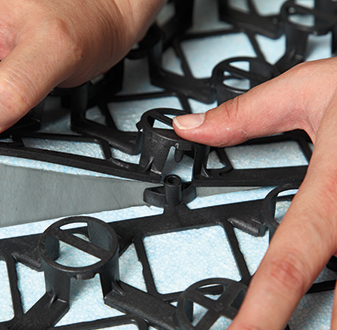
The Spider panel is a highly resistant 3-D polypropylene printed grid.
Its limited height and shape make it especially fit for renovation works, .with a consequent energy efficiency upgrade. The patented pattern of the three-dimensional grid enables to firmly fit the pipe during laying while encasing it completely into the screed. This provides an even and flawless heat distribution along with limited thermal inertia.
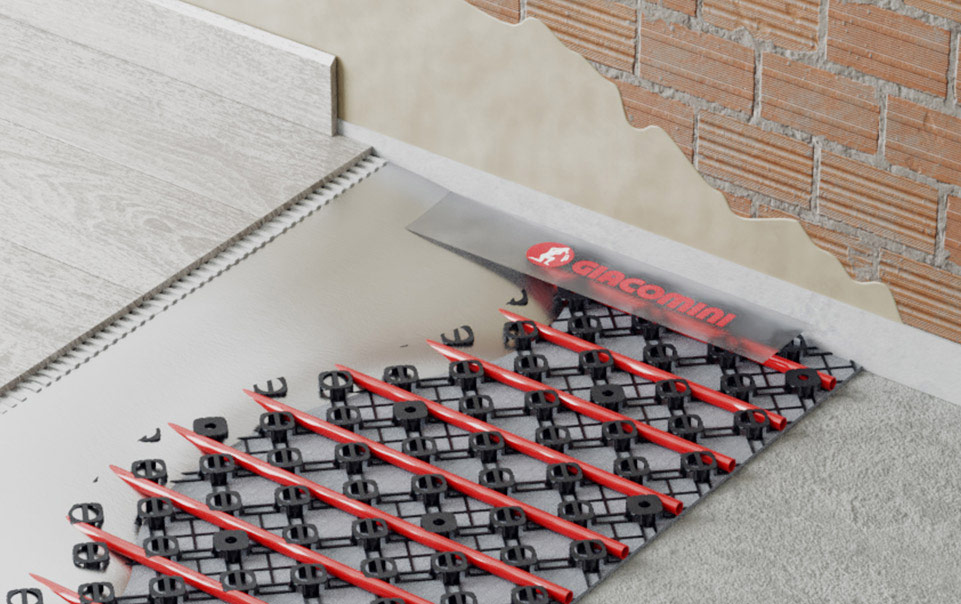
Spider enables to create 25-mm thick screeds for laying of the finish surface (ceramic tiles or parquet). The radiant system consists of standard installation components (cross-linked polyethylene or multilayer Ø17 or 16 mm pipes).
Spider Slim is the ideal solution for even more reduced thicknesses: screeds just 20 mm thick can be created with Ø12 mm pipes.
Spider CAM instead features the dimensions of traditional insulation panels (insulation/protrusion thickness from 10/22 mm up to 50/22 mm) yet it enables to create lower screeds thanks to the Spider 3-D grid. The CAM-certified (Minimum Environmental Criteria) EPS insulation panel combined to the grid is fit for installation in public premises.
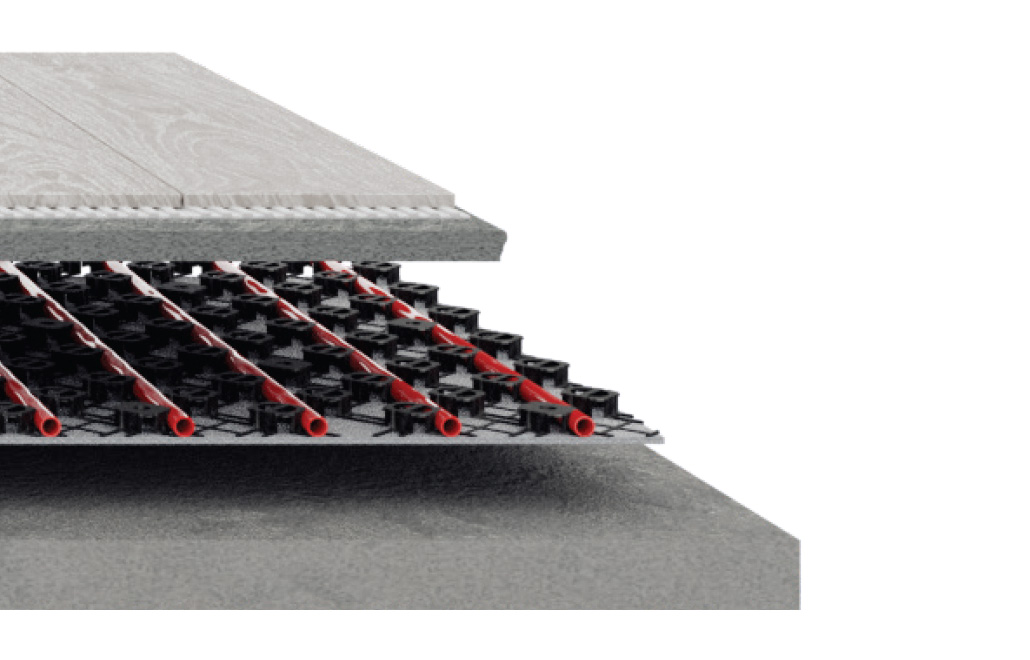
Typical section of a Spider radiant screed.

Panels for low-thickness and low thermal inertia radiant floor 🇬🇧 | Spider R979S | GIACOMINI
Spider is available in three versions: with self-adhesive base for application on existing floors or foundations; with fitting pins for application on an existing insulation layer (for ideal thermal insulation and best performance of the radiant system); with a 6 mm thick high-density insulation layer.
Spider Slim is available in two versions only: with self-adhesive base; with 6-mm thick high density insulation layer.
Spider CAM features one version only - with CAM-certified EPS insulation – but has a wide range of dimensions for use with sand or cement screeds.
Self-adhesive version
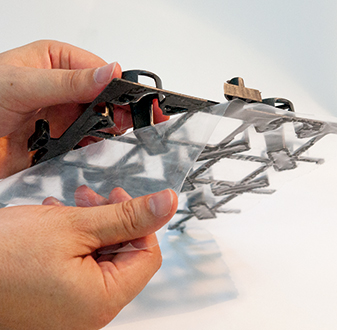
Remove the protection film and lay the panel on the foundation or the existing floor, then fit the side hooks on top to connect
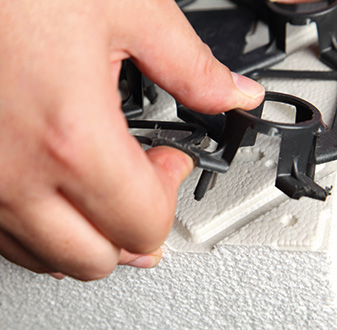
Version with pins
Fit the panel to the smooth insulation (already laid) by inserting the pins.
Insulated version
Lay the panels on the foundation or the existing floor and fit the side hooks on top to connect the panels to each other.


